What are digital Compressor plugins?
Using compression on vocals is crucial - it makes the vocals sound center-stage and takes the attention of the listener.
Compressing a signal is an act of making the volume of the sound last longer.
Some plugins are better for adding subtle airiness to your vocals, while other plugins are better for adding punch to your drums.
Some plugins are better suited for adding a subtle sense of space to your mix, while other plugins are better for adding punch and tightness to your mix.
Some plugins will offer more features, some will be easier to use, and some may even sound better than their more expensive counterparts.
Make sure to check out our ultimate guide to the 17 best compressor plugins you can use on everything - not just vocals!
Want to get your music on active & relevant playlists that actually get results?
Get your music heard now 👇

How to Use a Compressor plugin on vocals
When using compression on vocals, there are some special rules and best practices you must be aware of.
It's different than using compression on other elements, and that's why knowing which compressors are the best for vocals specifically is so important.
Here's a quick tutorial on how to use a compressor VST plugin on vocals. 👇
Many compressor plugins offer a free trial period, so you can try before you buy.
Be sure to research different compressor plugins to find the one that best suits your needs.
You can start with free options, then work your way up to premium plugins when you want to start editing sound in more advanced ways.
It's important to note that not all compressor plugins are the same, and some are better suited for different recording tasks than others.
9 Best Compressor Plugins For Vocals
Let's get you some nice vocal compression plugins!
These are the best compressor plugins for vocals at a glance:
- ADHD Levelling Tool (FREE)
- MeldaProduction MCompressor (FREE)
- Ableton Glue Compressor (FREE)
- Universal Audio 1176 Compressor
- FabFilter Pro-C 2
- Universal Audio Empirical Labs Distressor
- Soundtoys Devil-Loc Deluxe
- Softube Tube-Tech CL 1B
- iZotope Ozone 9 Dynamics
Click on whichever plugin or topic above to navigate right to it!
With so many compressor VSTs out there, choosing the right one for vocals is not easy.
Vocals can be tricky to compress and master in general, so you want to make sure you have the right tool for the job.
With such a key part of the music production process, you need to have tools that can help you produce music easily and quickly.
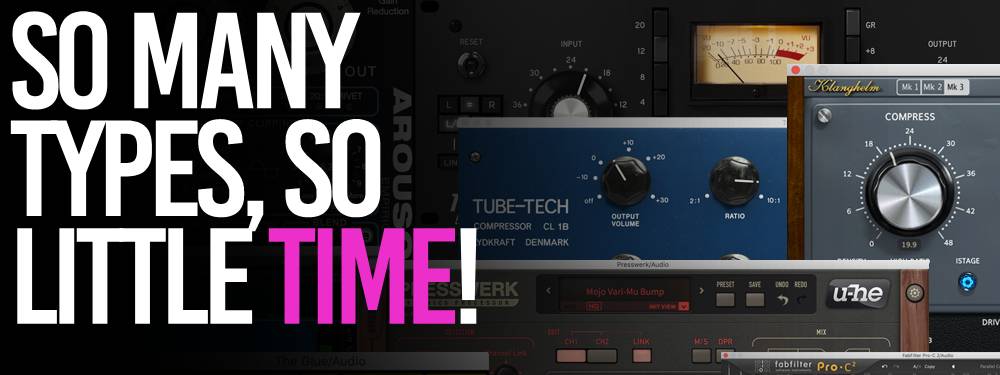
More seasoned producers know what kind of compression they need, and they have a special plugin for every sound.
These include smooth compression, optical compression, bus compression, FET compressor, and more.
But choosing the right compressor plugin isn't easy because there are so many out there.
The right tool can make all the difference, so keep it simple by identifying what kind of compressor is best for your mix.
#1. ADHD Leveling Tool (FREE)
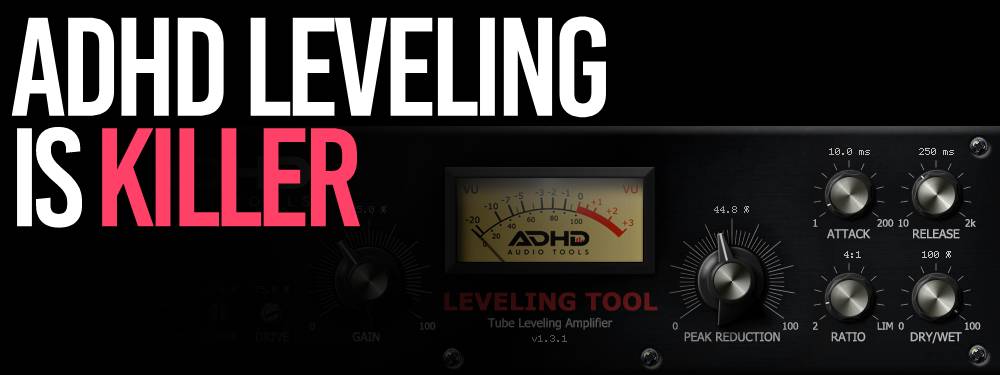
The ADHD Leveling Tool will help the vocal track stand out in the mix with a more even and professional sound.
A vocal compressor will take the loud peaks in your vocal track, bring them down, and make the track sound more even and professional.
The AdHd Leveling Tool is a tube compressor that is inspired by the legendary compressors of the 60s and 70s.
It has been carefully crafted to meet the needs of modern mixing software.
It is just as likely to give you retro sounds as it is to give you modern sounds, it's up to how you use it.
Check out the ADHD Leveling Tool here.
#2. MeldaProduction MCompressor (FREE)
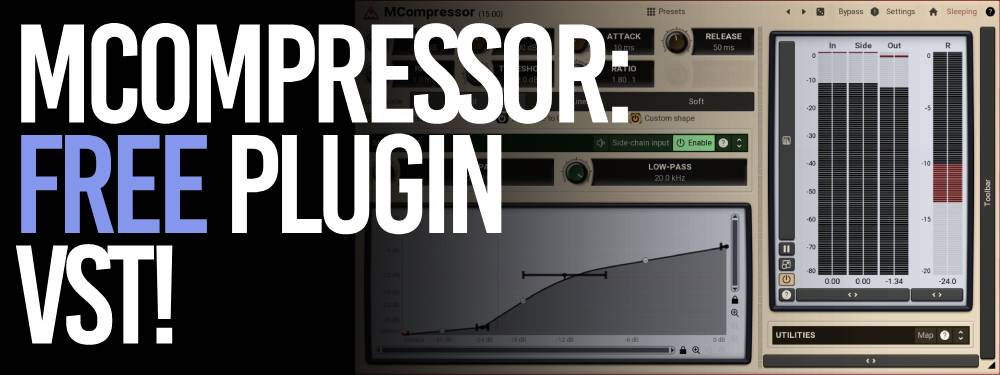
If you need to compress your vocals in a short amount of time, MCompressor is a very good choice.
It features a very high sample rate, so you can compress large amounts of audio very quickly.
This can be very useful for music production where time is of the essence. The MCompressor can also be very useful for smoothing out vocals and reducing harshness in the mix.
The MCompressor features transparent gain controls, so the changes can be made without adding color.
It also has input/output gains and release times as well as a wide range of other parameters that allow for many useful adjustments to make to your mixes and masters.
The MCompressor features a series of high-quality distortion algorithms that can be used creatively to change the sound of the compressed signal.
The plugin also includes 3 different knee modes with size adjustment options for better-sounding compression.
The mid/side processing and upsampling capabilities, safety limiter functionality (which is extremely useful), and automatic gain compensation feature allow you to use the compressor on instruments playing louder than others.
This lets you keep all levels consistent instead of just one or two instruments getting over-amplified while everything else stays at normal volume levels - and prevents clipping!
Check out the Mcompressor here.
#3. Ableton Glue Compressor (FREE)
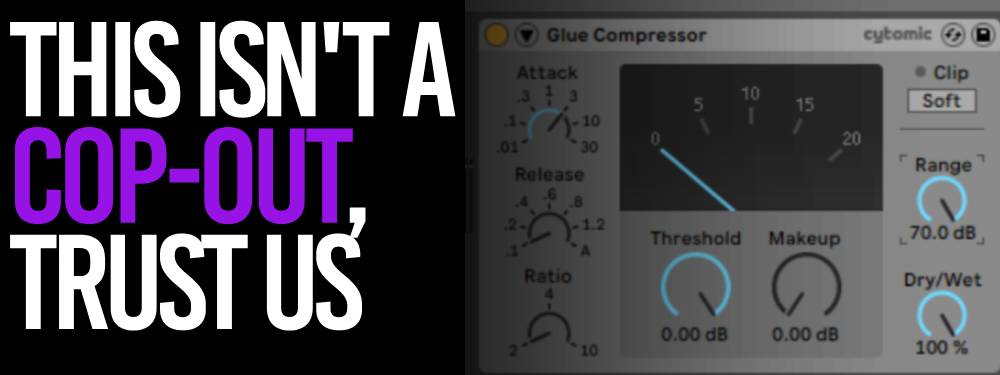
If you're an Ableton Live Suite user you already have access to an excellent VCA style compressor modeled on the SSL bus comp.
And it gets the job done swell when it comes to vocals.
Don't let its simplicity fool you: it's one of the best Ableton plugins you can use!
What’s great about this compressor is that it can do a lot with a little. It doesn’t take up a lot of processing power and has a simple interface that makes it easy to use.
It can easily be found in most virtual mixing boards thanks to its high-quality sound design. It's comparable to Solid State Logic compressor VSTs, especially if you're a new producer who can't push plugins to their limits just yet.
Check out how to use Ableton and their Glue Compressor here.
#4. Universal Audio 1176 Compressor Plugin

1176 is a popular FET compressor - possibly the most popular.
Lots of studios like to use these for vocals because of the signature sound and warmth they provide.
Waves skipped no details when designing this plugin - it's as top-notch as any other they make.
The UAD 1176 compressor can be used in different ways, from being used on your master bus to being used on individual elements like a chorus or lead vocal.
It really is a Swiss knife plugin that can handle any audio material from vocals to your full mix.
You can use it to add a subtle touch to your sound or you can use it to give your sound a more “squeezed” and “pushed” vibe.
It works especially well when you want to add some grit and compression to your sound.
This plugin is a must-have for any producer, and its gain reduction adjustments are best-in-class.
It can be used in many different ways and it can be applied to different types of instruments. It has an intuitive user interface and it has some very useful features.
Check out the popular UAD 1176 Compressor here.
#5. FabFilter Pro-C 2
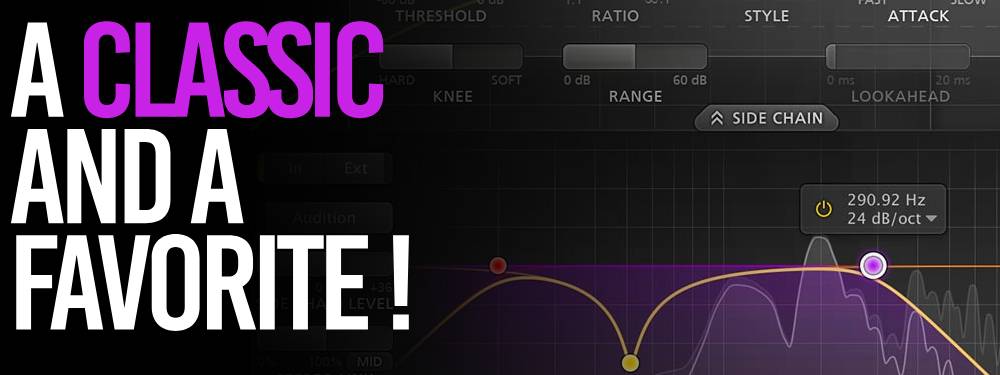
FabFilter Pro C2 is an incredible compressor that packs eight compression character styles, lookahead gain reduction, 4x oversampling, and mid/side control into one of the most incredible interface designs plugins have seen.
Not to mention the fact that it offers some of the best sounding and most flexible sidechain compression available, you're able to create some wicked vocal compression busses with this.
While we like this for everything in general, it's especially good for vocals, since vocals are so finicky to work with.
This lets you get rid of all the fuss!
Whenever you need a powerful yet flexible solution, look no further than the FabFilter Pro C2.
Here are some of the newly added features:
-
Eight different compression styles, of which five are new in version 2: Vocal, Mastering, Bus, Punch, and Pumping
-
Range setting, which limits the maximum applied gain change
-
Mix setting, which scales the gain change from 0% to 200%
-
Side-chain EQ section, with customizable HP and LP filters, plus an additional freely adjustable filter
-
Accurate, large level and gain change meters, with peak and loudness level visualization. The loudness level complies with the Momentary mode of the EBU R128 / ITU-R 1770 standards
-
Smooth lookahead (up to 20 ms), which can be enabled/disabled to ensure zero latency processing
Check out the Fabfilter Pro C-2 here.
#6. Universal Audio Empirical Labs Distressor
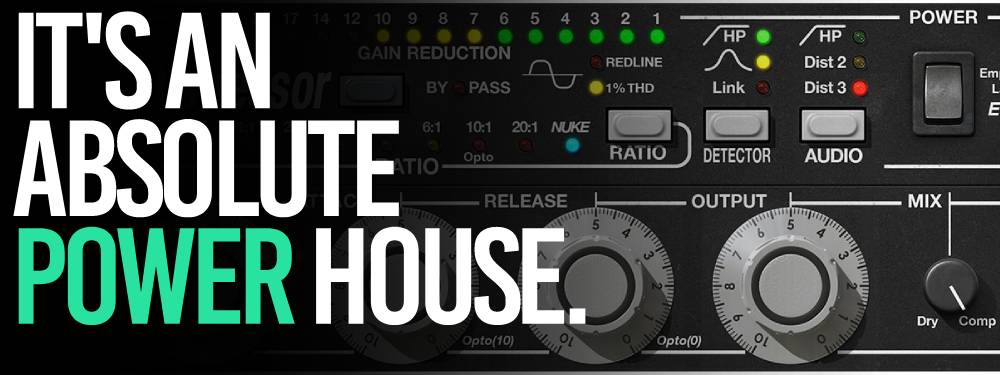
The UAD Dave Derr EL8 Distressor is a meticulously designed emulation of the famous hardware emulator from Empirical Labs, which was commercially released in 1993.
This is an all-time favorite for producers wanting to make vocals stand out in a mix.
The sound of this software plugin is more aggressive than the original and will stand up to any digital emulation out there as an everlasting classic.
Distressor's staggering variations in compression, from 1:1 to 20:1 deliver unique tones and curves.
For warming up synths or strings without compressing them too heavily, use the 1:1 ratio; for adding low-order harmonics (low-end frequencies) to an entire mix, try the 10:1 setting.
The famous Nuke limiter is perfect for adding explosive excitement and energy to room mics or a whole mix of instruments!
Distressor's Dist 2 and 3 modes offer a wide range of coloration.
You can shape the source using either combined even-order or odd-order harmonic distortion, depending on how you want it to sound.
Check out the Empirical Labs Distressor here.
#7. Soundtoys Devil-Loc Deluxe
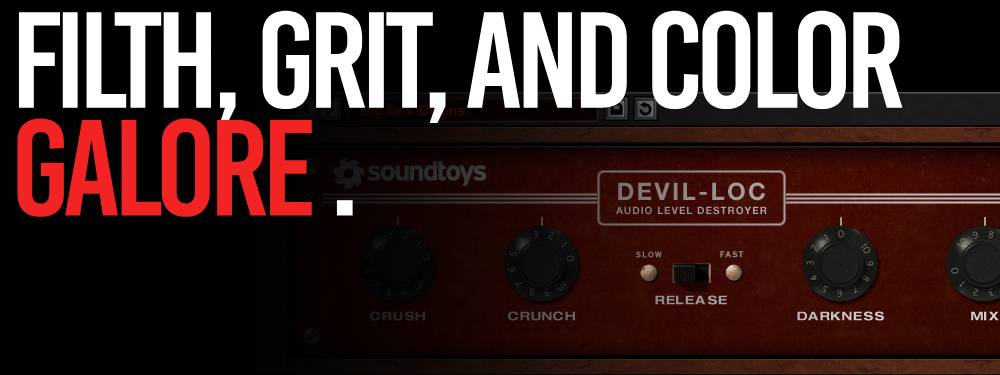
Soundtoys is taking on the classic Shure Level-Loc compressor plugin to give it a few modern tweaks.
This one was also listed in our best vocal plugins article since this is such a great addition to thickening vocals.
To begin, the original Level-Loc had only three controls: an input level knob, a distance selector, and a bypass switch.
Fortunately for Soundtoys, they upgraded this feature from just having those three controls to having full control over compression levels (crush), and saturation effects (compressors for "pumping" or making loud sounds louder).
Some sliders could be set fast or slow release times and even tone-shaping through darkness settings.
Not only that, there's blending in your dry signal at different ratios from -100% up to 100%.
Soundtoys also includes a new graphical interface that allows you to see and tweak the compression ratio of your compression on the fly.
It's a HUGE time saver when dialing in your settings.
The original Level-Loc was also limited in its tonal range, but Soundtoys upgraded the Level-Loc with new controls that allow you to dial in anything.
Here are the control settings:
- “bright and analytical”
- “dark and vintage”
- “warm and analog”
- “harsh and cutting”
- thin and sparkly”
- “fat and vintage”
- “lush and cutting”
Really, you can get whatever sound you can imagine.
Check out the Devil-Loc Deluxe here.
#8. Softube Tube-Tech CL 1B
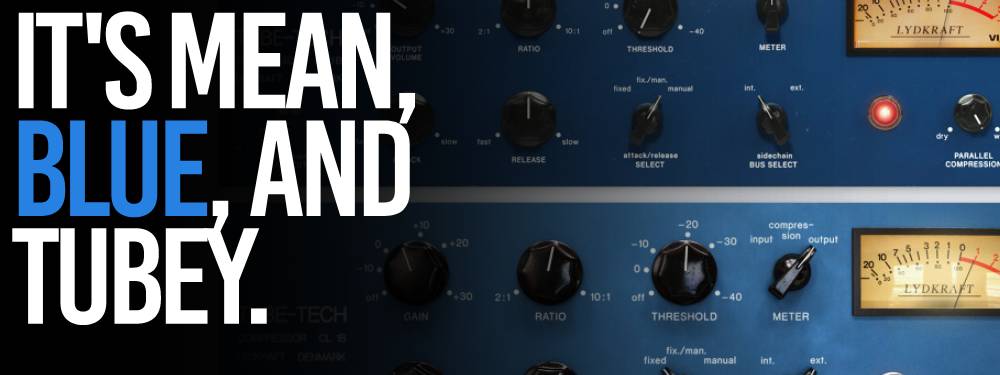
The award-winning Tube Tech CL 1B Optical compressor is a silky smooth and mellower alternative to the numerous in-your-face dynamics processors.
It tends to be more transparent and forgiving than many similar products.
I'll most often use CL 1B when I'm looking for a warm, somewhat subtle, and musical compressor sound which usually takes very little time to dial in.
This is especially useful when you're trying to create a uniquely warm environment with vocals or a chorus. It's gotten me out of quite a few pickles when mastering!
With just a few quick turns of the chunky black threshold knob, attack/decay knob, and release/ratio knob - you can quickly get your desired transparent compression sound!
Thanks to the new changes and updates of the Tube Tech, this Mk II version sounds better than ever.
It features cutting-edge high-res graphics as well as a feature update that includes side-chain low-cut filters and parallel mixing.
One of the reasons why so many vocalists love this Tube Tech compressor is that it has a smooth release, meaning no pumping or artifacts during quieter passages.
This makes it easier to keep in time with other instruments and not lose any clarity from the music.
Check out the Tube-Tech CL 1B here.
#9. iZotope Ozone 9 Dynamics
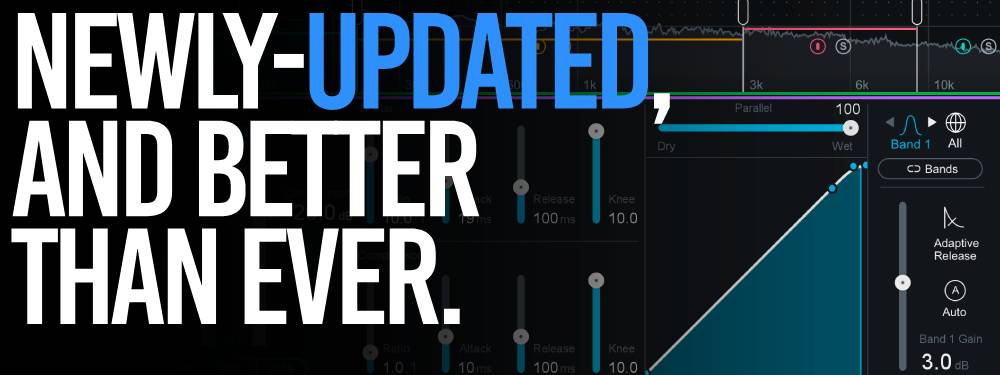
The Ozone 9 Dynamics is the freshly updated multi-band compressor that offers advanced functionality for mastering and mixing and is a step up from the previous Ozone 8.
This plugin provides the functionality of a quality limiter with a quality compressor.
This is just a well-rounded VST plugin that can handle vocals pretty well, especially if they're not in the foreground and are more just a side item (like in electronic music).
Its ability to fine-tune how audio sounds ensures that your finished product will sound just as you intended.
This makes it great for mastering since its main goal is to act as a compressor.
It features mid/side processing, advanced metering, and variable look-ahead times.
The detection filter feature gives you more configuration options to adjust the incoming signal's effect on compression algorithms.
High pass and tilt modes enable tuning the signal for greater or lesser effects, and other useful features such as learn mode allow setting crossover points for multiband mode.
A great tip is to sidechain the high pass filter and use more advanced modulation to push this compressor VST plugin to its limits.
Check out the iZotope Ozone 9 Dynamics here.
All About Compressor Types
There are two main types of compressors: analog and digital. Analog compressors tend to sound warmer, whereas digital compressors tend to sound more dry and more clinical.
What makes one compressor better than another is the sound characteristics and feature sets.
A compressor with a tube amplifier to mimic analog gear will add unique color to your sound as opposed to a clean compression mode from a stock compressor.
Digital compressors are perfect whenever you want ultra-transparent compression that doesn't affect the basic sound of the source material.
It all comes down to the compression algorithm. That will color (or limit color) on your audio signals, fulfill the parallel processing, and give you dynamics control. It's easy to get overwhelmed.
The best way to get started with compressor plugins is to experiment with different settings until you find a sound you like.
Nowadays though, there are plenty of analog emulations that retain the harmonic characteristics of the analog units but are available in convenient VST form.
These classic compressor iterations usually also come with modern features that the original hardware unit would never have.
Take a tone-shaping tool - with a VST, you can actively monitor frequencies and have beautiful displays to better understand what your audio is doing.
Most digital compressors tend to be less expensive than their analog counterparts, so they are typically found on cheaper audio interfaces and in budget-priced hardware compressors.
In contrast, the majority of producers will never touch an analog compressor because it is usually ridiculously expensive - a trend that holds true for most musical instruments as well.
You can have the humble compressor VST plugin of today's age - it will give you everything you need, and probably even more.
Here are some of the benefits:
-
Advanced gain reduction control
-
Built-in limiter mode in many hybrid compressor plugins
-
Killer transient control
-
Modulation ability for attack and release settings
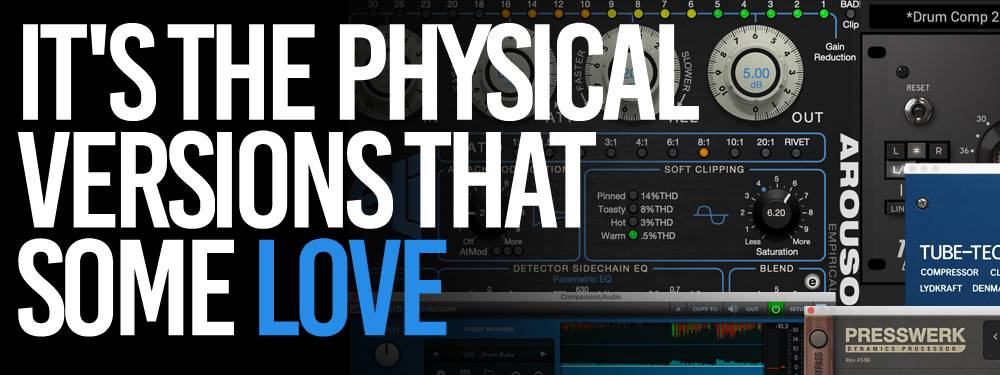
What About Analog Compressors?
Analog compressors typically cost more than digital ones, but they offer one uniquely advantageous feature - their nonlinear nature.
In contrast to digital compressors, which have an exact depth of volume that they can affect, analog compressors do not control the tone as much and are not designed for a precise level.
For recording guitars and bass guitars, this is especially helpful because digital compressors often cause issues with these instruments.
However, an analog compressor is not designed to have a flat response, so it will have some effect on the tone of your signal.
How to Use Hardware Compressors
A hardware compressor works by squeezing the signal into a box, usually with a volume knob and an input level knob.
The signal is passed through the box and then compressed before its output.
Hardware compressors are different from software as they're more transparent, giving you stronger control over your sound, and also much less frustrating.
The downside is that you’re usually going to have to buy a hardware compressor, and they’re not cheap.
Hardware plugin compressors like Waves Renaissance Compressor, however, are perfect for use with your computer.
When you're finished recording, you can easily switch your computer's audio to the hardware interface and get every last bit of sound out of your signal.
What's Different in a Vocal Compressor?
Vocal compression is often done to make a track sound louder and more present.
This is usually done by bringing up the "level" of the vocal, but it also can be done by reducing the "level" of the vocal.
Vocal compression is usually done using an optical compressor; it’s designed to emulate the sound of an optical compressor.
What are the most common compression styles?
When it comes to compression, there are many different techniques available such as these four styles of audio signal modification:
Level: This is a type of compression where the gain (volume) is reduced with the volume.
This may be achieved by raising the threshold, which would make "brighter" or "sharper" sound sounds seem louder and clearer than before.
Ratio: This is the amount of gain that is squashed and how much is left untouched.
The ratio is usually expressed as a percentage, such as 5:1, 10:1, etc. The sound may be perceived as "mids," "lows," or "highs," which is achieved by lowering the threshold.
Threshold: This is the point at which the signal is compressed.
The threshold is usually expressed as a signal level, where a signal is below a threshold, the signal is not compressed.
Expander: An expander is a tool designed to expand a signal, allowing the signal to be heard again without being compressed.
How Compressors Affect Dynamic Range
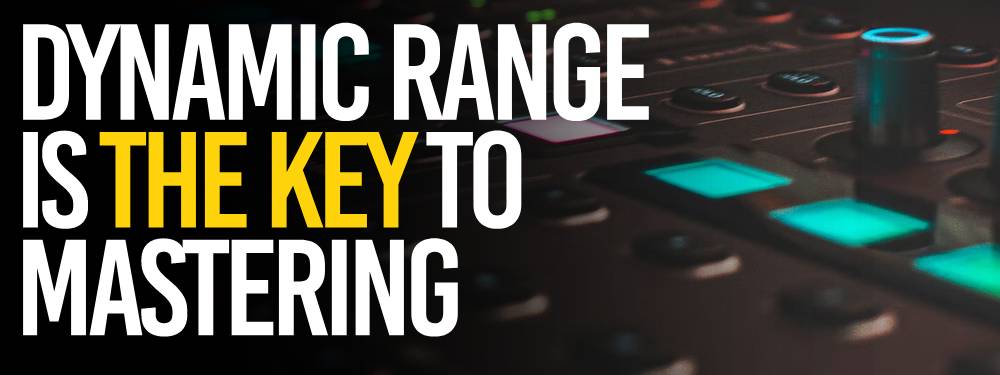
Dynamic range is the difference between the loudest and softest parts of a track.
This is what’s left after you remove the loud parts from your music, and it can be used to create more interesting passages in your composition.
The volume at which a track is recorded and the dynamic range of the instruments will affect how much of a difference there is between the loudest and softest parts.
A track with a high dynamic range will have a lot of volume variation; it may include loud and soft parts that are far apart in volume.
As a result, there will be a big difference between the loudest parts and the softest parts of the track.
A low dynamic range track has a weak audio signal, with little volume variation and soft and loud parts close to each other.
Get your music on playlists now.
It’s time you get your exposure and listeners up - playlisting by Boost Collective has been trusted by 50,000+ artists worldwide.
It’s easy: Search your song, get on playlists, and track your campaign.
What’re you waiting for? Tap in - and get added to playlists in 24 hours.
Join Boost Collective for free here.